Node-RED flows for Microsoft Azure
My blog is about to go dark for two weeks. No new Internet of Ideas articles will be posted until Thursday, September 1, 2016, I take a two-week vacation.
Last post before vacation is about node-Red on Microsoft Azure using local data and Watson APIs. I am a Bluemix guy but I am also in love with node-RED for this reason I am exploring the Azure platform , I wanna to test node-RED on Azure cloud and I would like use Watson APIs from Azure to create mashup flows that involve Bluemix and Azure.
First step is necessary to create an Azure Microsoft account, you will have $200 USD in free credits to use however you’d like for a month, you have to provide you credit card as a form of identity validation and verification. With a free account you can build and deploy an app, launch a website or blog, hunt for hidden patterns in your data with Azure Machine Learning, deploy virtual machine and install node-RED 🙂

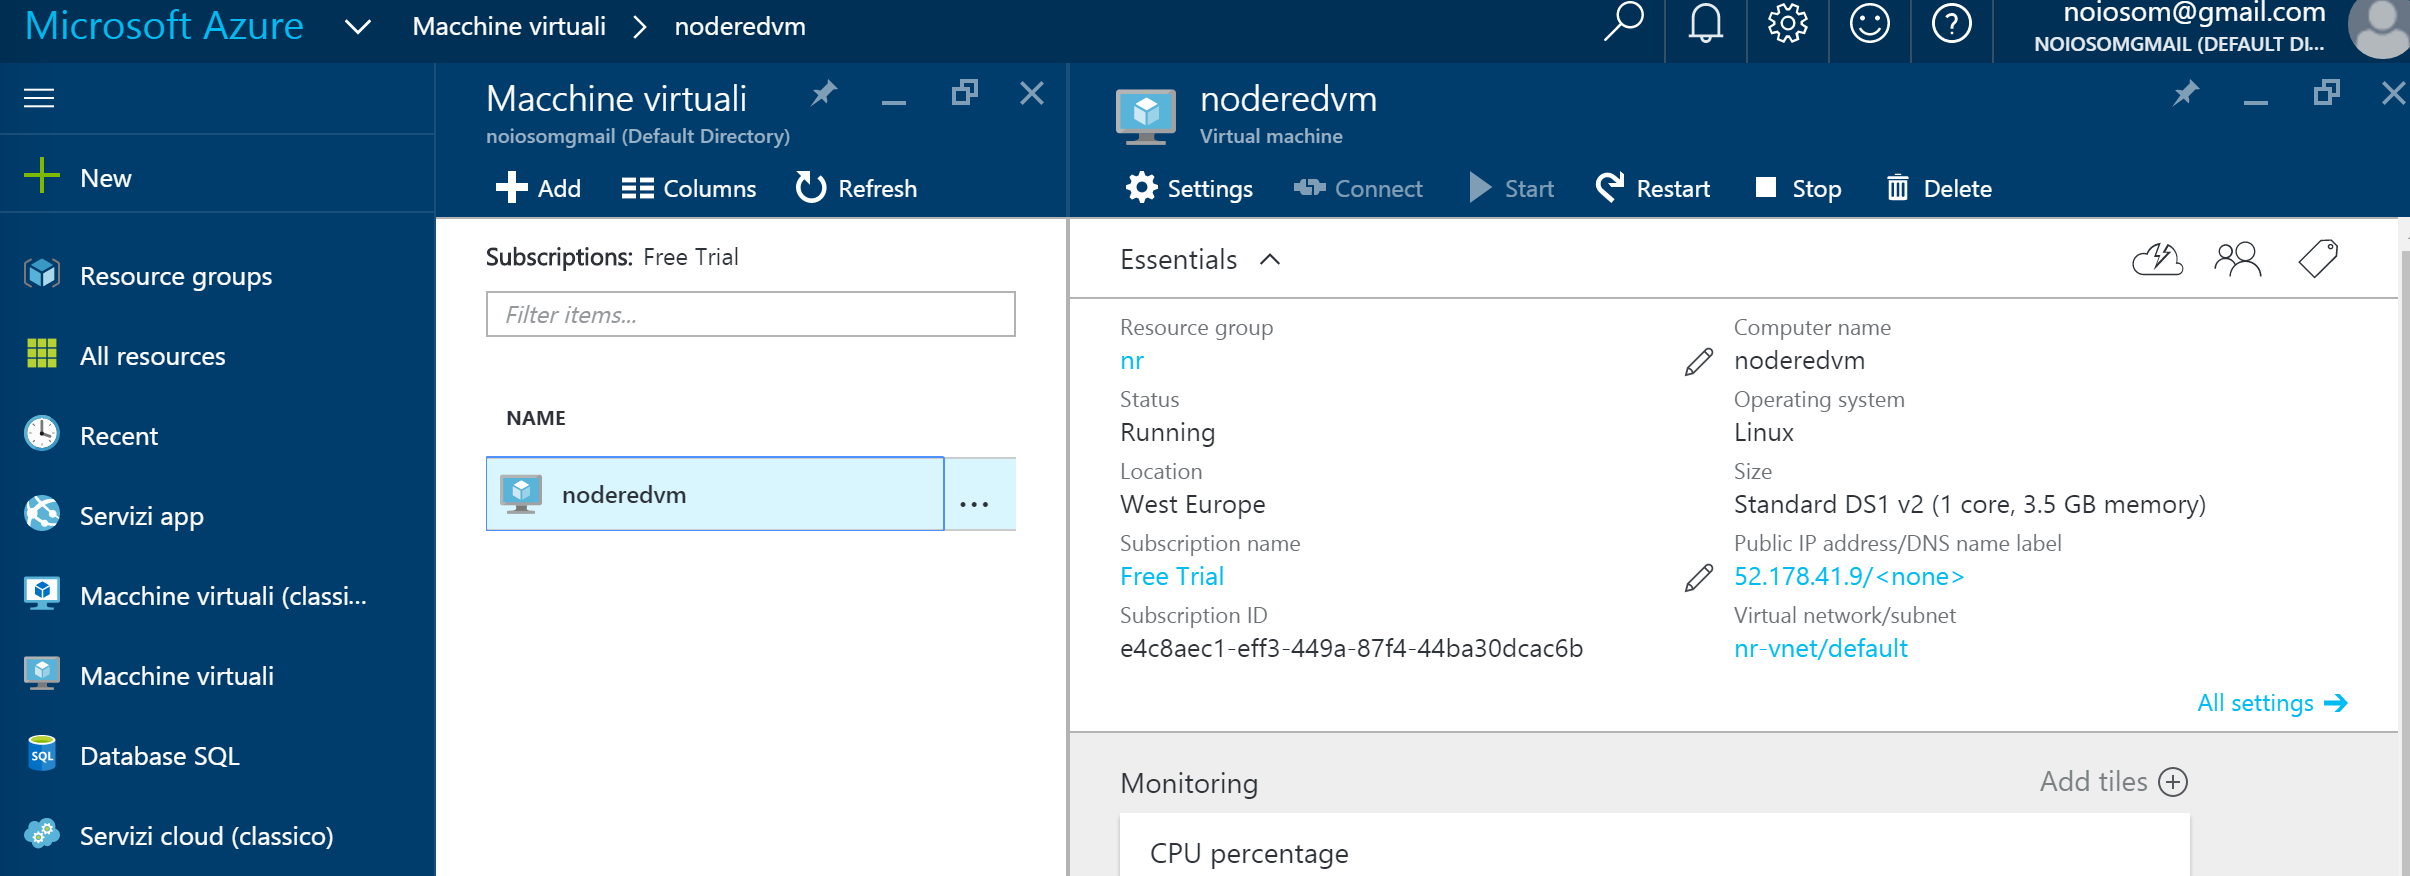
First step: Create a virtual machine
Log in to the Azure console, click to add a new virtual machine and select Ubuntu Server. You have to provide the server name, the username for authentication and the size of your instance. I have started with a minimal machine, the node.js is single-threaded so there is no benefit to choose a size with multiple cores for a simple node-red instance, next time I will use the auto-scaling Azure service.
A very import aspect regards the network security group option. I added a new inbound rule:
protocol: TCP
destination port range: 1880
this inbound rule is necessary to route the connections to node-RED instance.
Second Step: install Node-RED
Log in Azure virtual machine:
ssh [email protected]

Welcome to Ubuntu 16.04.1 LTS (GNU/Linux 4.4.0-31-generic x86_64)
and install Node-RED:
curl -sL https://deb.nodesource.com/setup_4.x | sudo -E bash -
sudo apt-get install -y nodejs build-essential
sudo npm install -g node-red
At this point you can test your instance by running node-red:
mnoioso@noderedvm:~$ node-red

Welcome to Node-RED
===================

17 Aug 08:11:03 - [info] Node-RED version: v0.14.6
17 Aug 08:11:03 - [info] Node.js  version: v4.4.7
17 Aug 08:11:03 - [info] Linux 4.4.0-31-generic x64 LE
17 Aug 08:11:03 - [info] Loading palette nodes
...
17 Aug 08:11:04 - [info] Settings file  : /home/mnoioso/.node-red/settings.js
17 Aug 08:11:04 - [info] User directory : /home/mnoioso/.node-red
17 Aug 08:11:04 - [info] Flows file     : /home/mnoioso/.node-red/flows_noderedvm.json
17 Aug 08:11:04 - [info] Server now running at http://127.0.0.1:1880/
17 Aug 08:11:04 - [info] Starting flows
17 Aug 08:11:04 - [info] Started flows
Once started, you can access to Node-Red flow editor to http://ip_address:1880
Moreover I have installed Watson nodes on Azure Node-RED 🙂 here is the shell command:
sudo npm install node-red-contrib-ibm-watson-iot
and on both Node-REDs (Bluemix and Azure) I have installed Azure IoT Hub, to send IoT data directly to an Azure Hub as an alternative to Watson IoT platform, here is the shell command:
sudo npm install node-red-contrib-azure-iot-hub
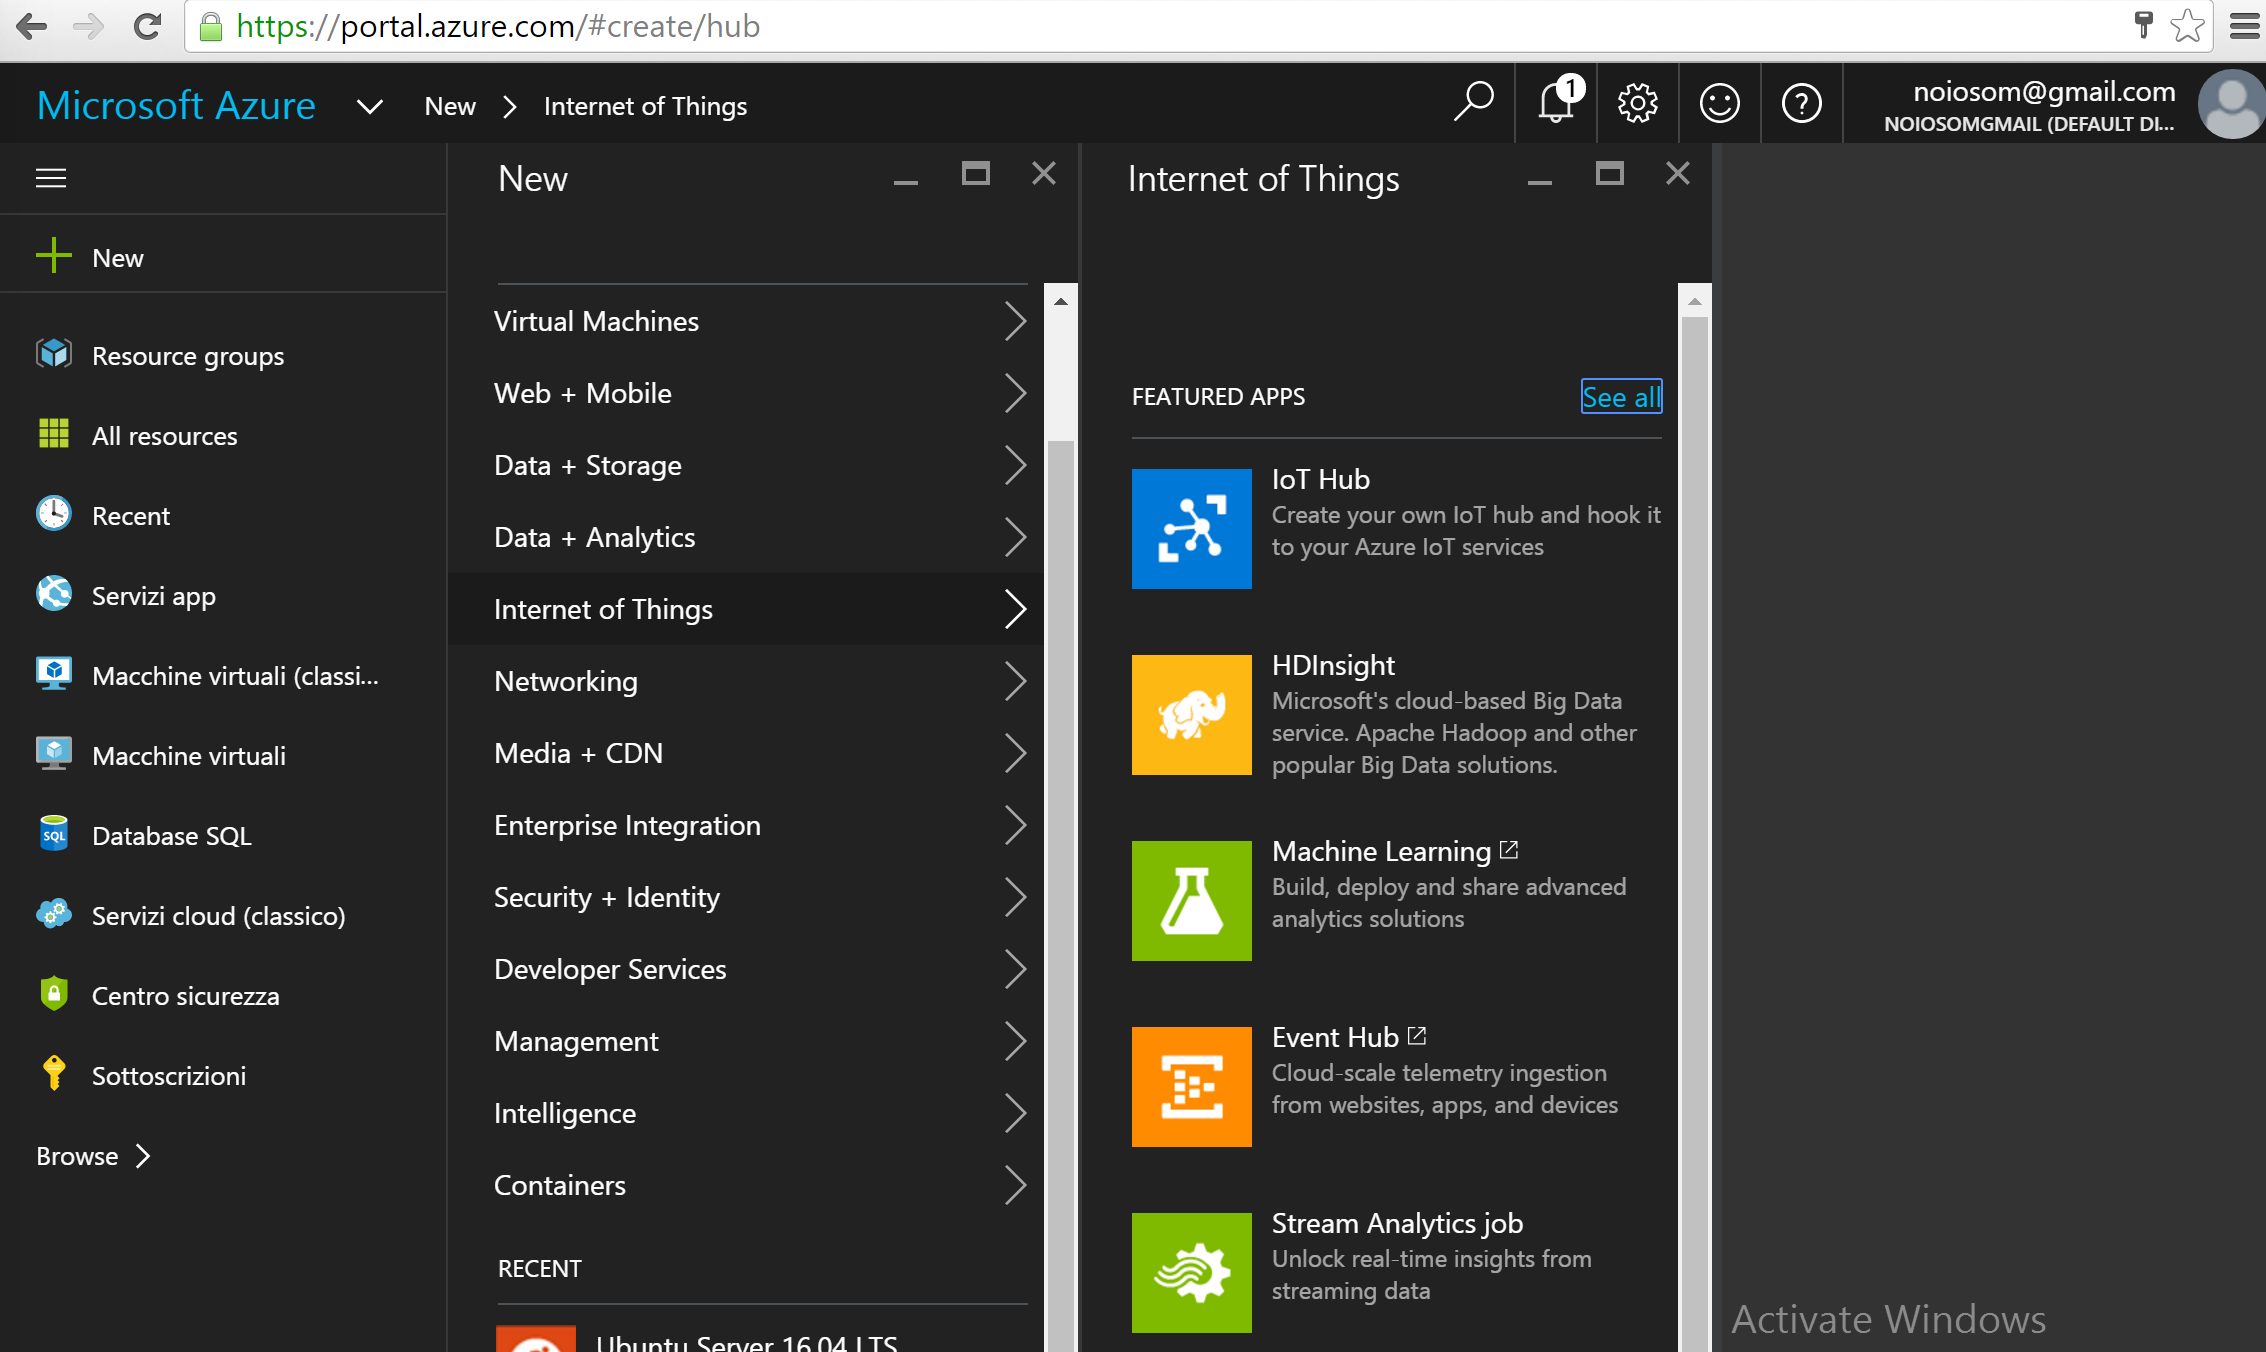
Azure IoT Hub allow to establish bi-directional communication with millions of IoT devices. Rely on Microsoft Azure IoT Hub to easily and securely connect your Internet of Things (IoT) assets. In cloud-to-device messages, reliably send commands and notifications to your connected devices—and track message delivery with acknowledgement receipts.
So, by the Azure console, I have added a new IoT Hub, it is more or less equivalent to our Watson IoT platform:
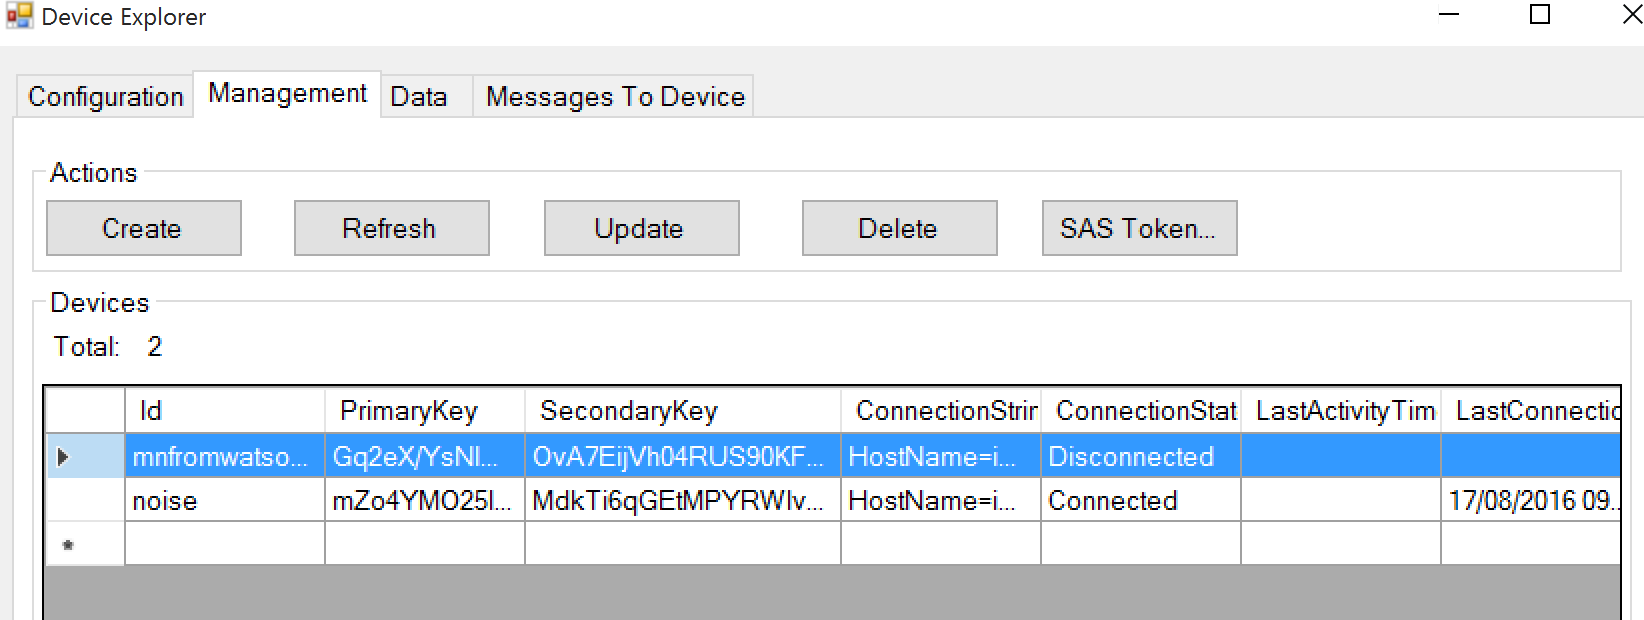
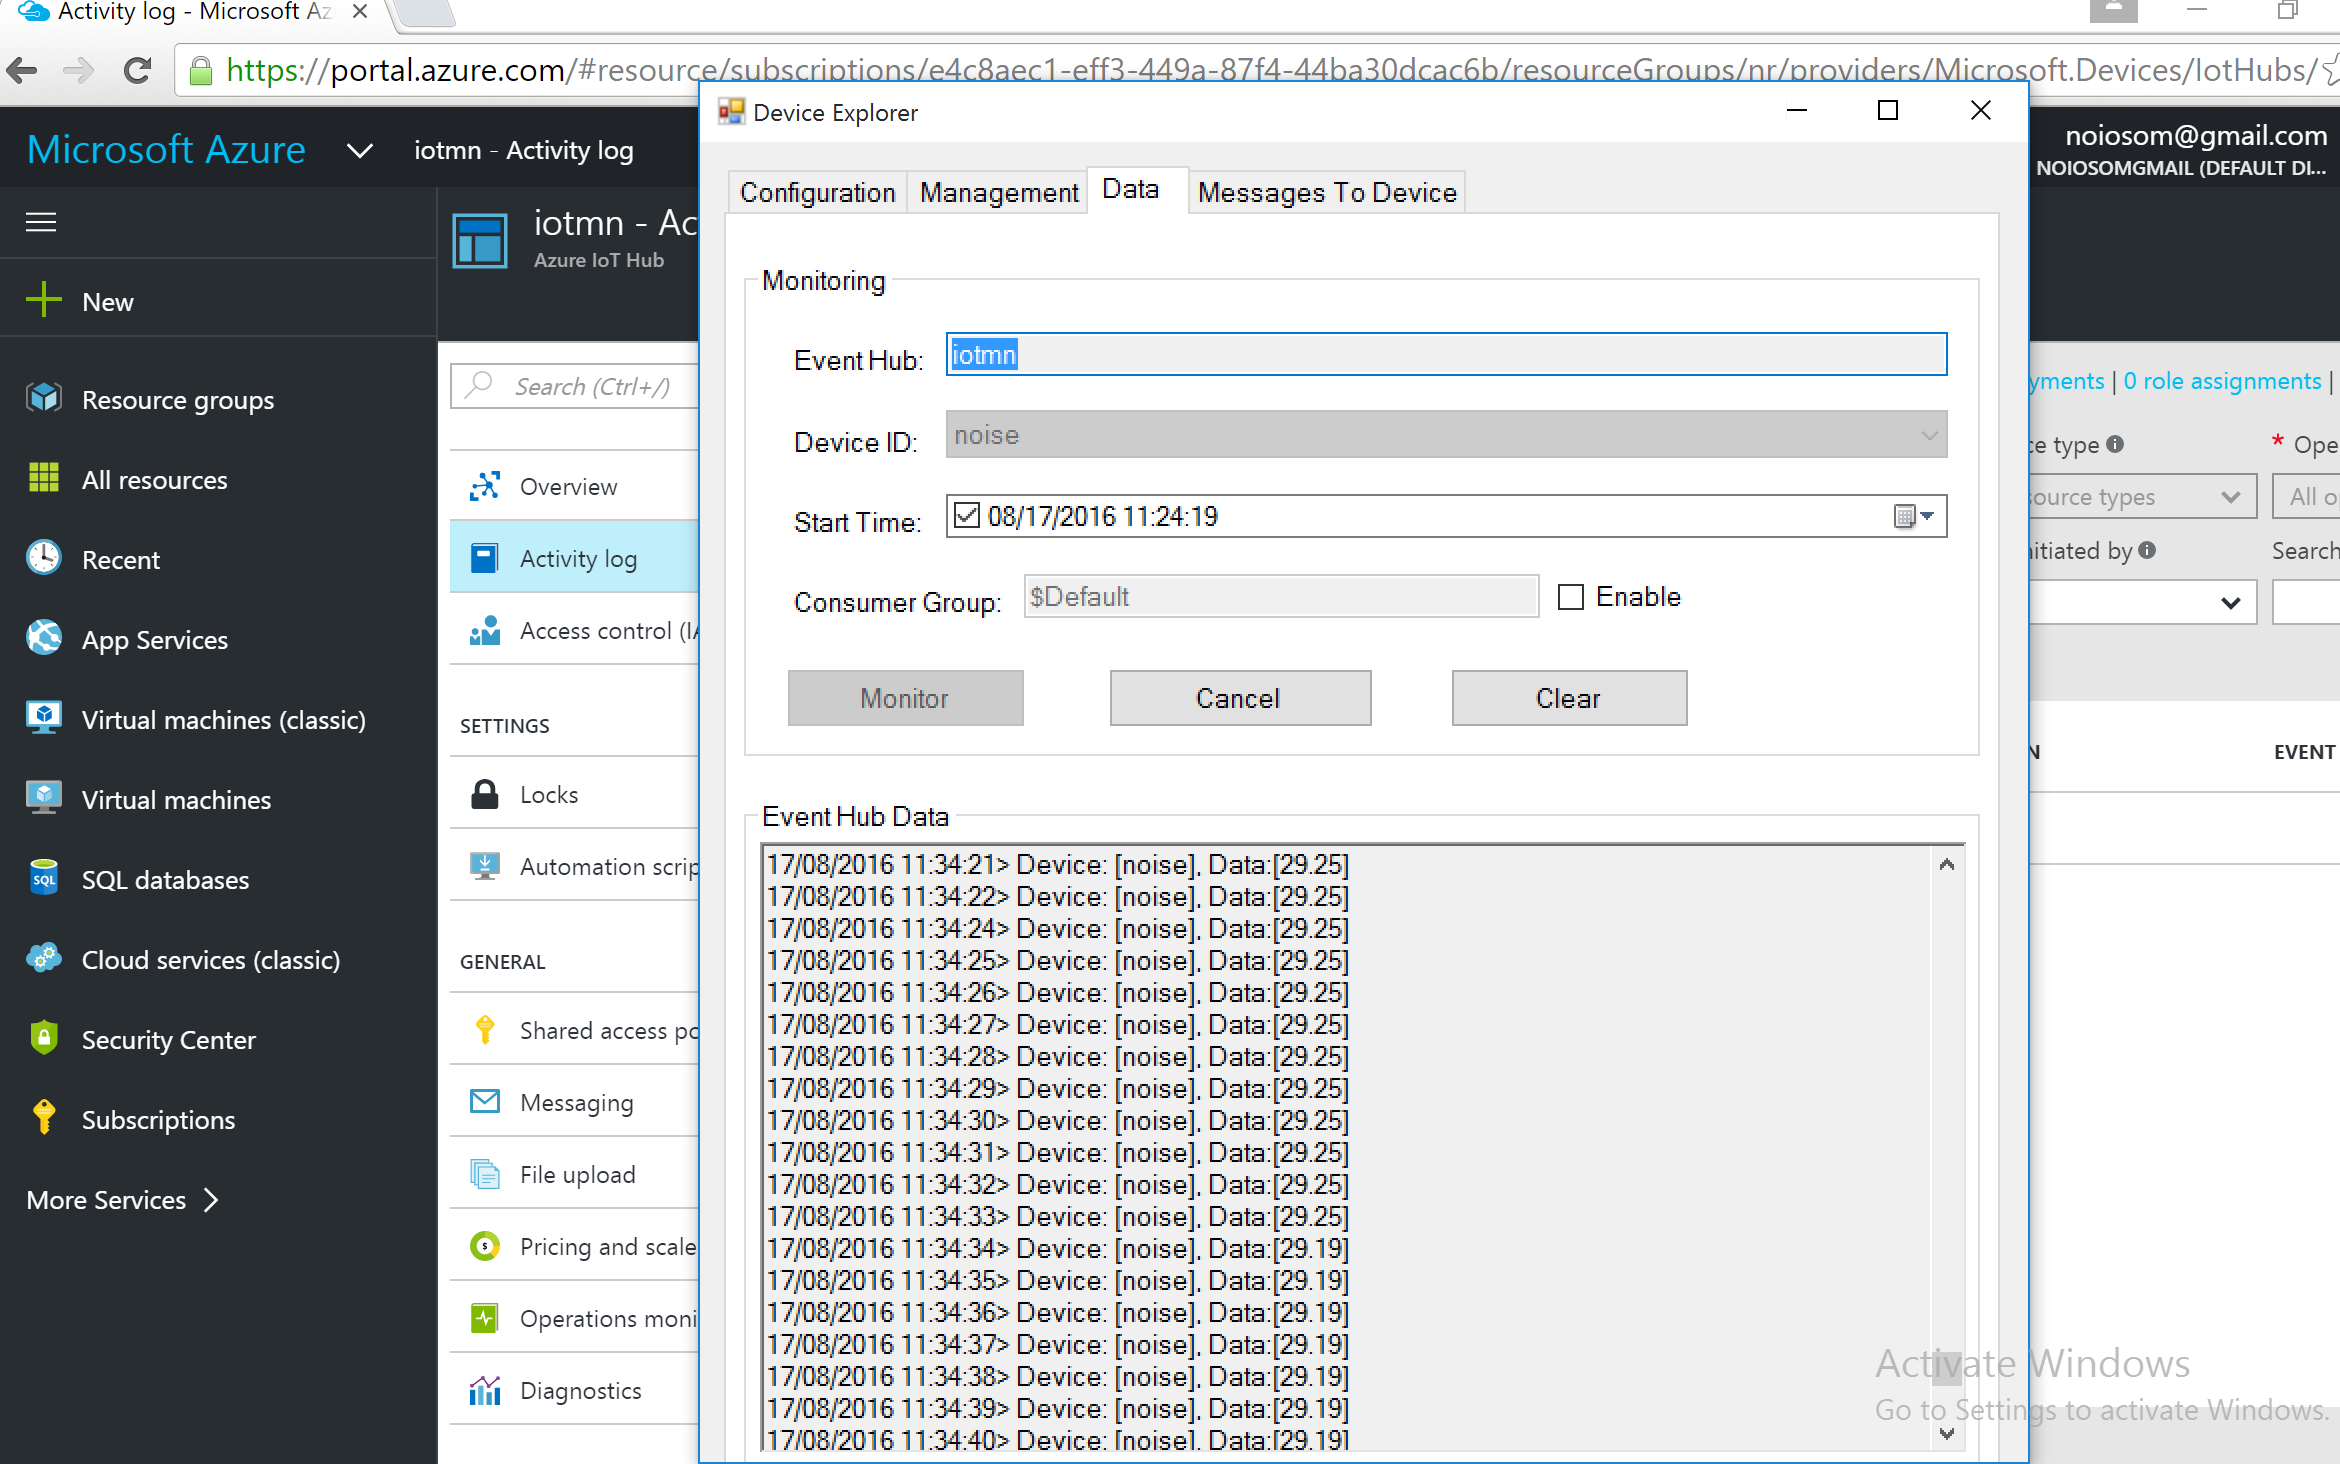
To manage the devices connected to the Hub can be very useful to install the Device Explorer application, here is the device explorer download link.
To connect the Device Explorer with the IoT Hub you have to use the connection string provided during the IoT Hub creation, then by the Management tab I created a new device with specific device ID.
For any device created a SAS Token is generated, the token is necessary to connect an IoT device node to the Hub.
Any device node in a Node-RED flow have to use a message payload similar to the follow:
msg.payload = {
"deviceID" : "noise",
"SAK" : "mZo4YMO25lCjp05vDzfCxsQhyg6LSOt8oZFewL2h48w=",
"Protocol":"mqtt",
"Data": msg.payload.d.Temp
}
you have to provide at least the device ID, the Shared Access Signature Key (often called a token), the protocol type, and the Data, in this simple example I’m sending the ambient temperature using the ESP8266 device, more details here.
Here are the data received by the Azure IoT Hub:
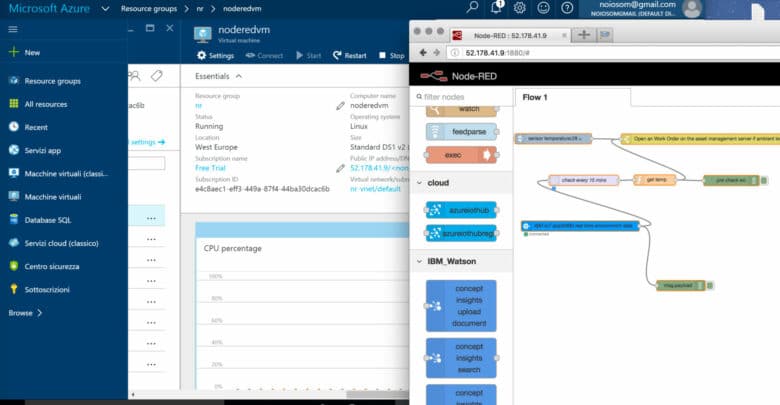
After this bootstrap phase, it’s my first experience with Microsoft Azure environment, I implemented two Node-RED flows:
First Azure node-RED flow
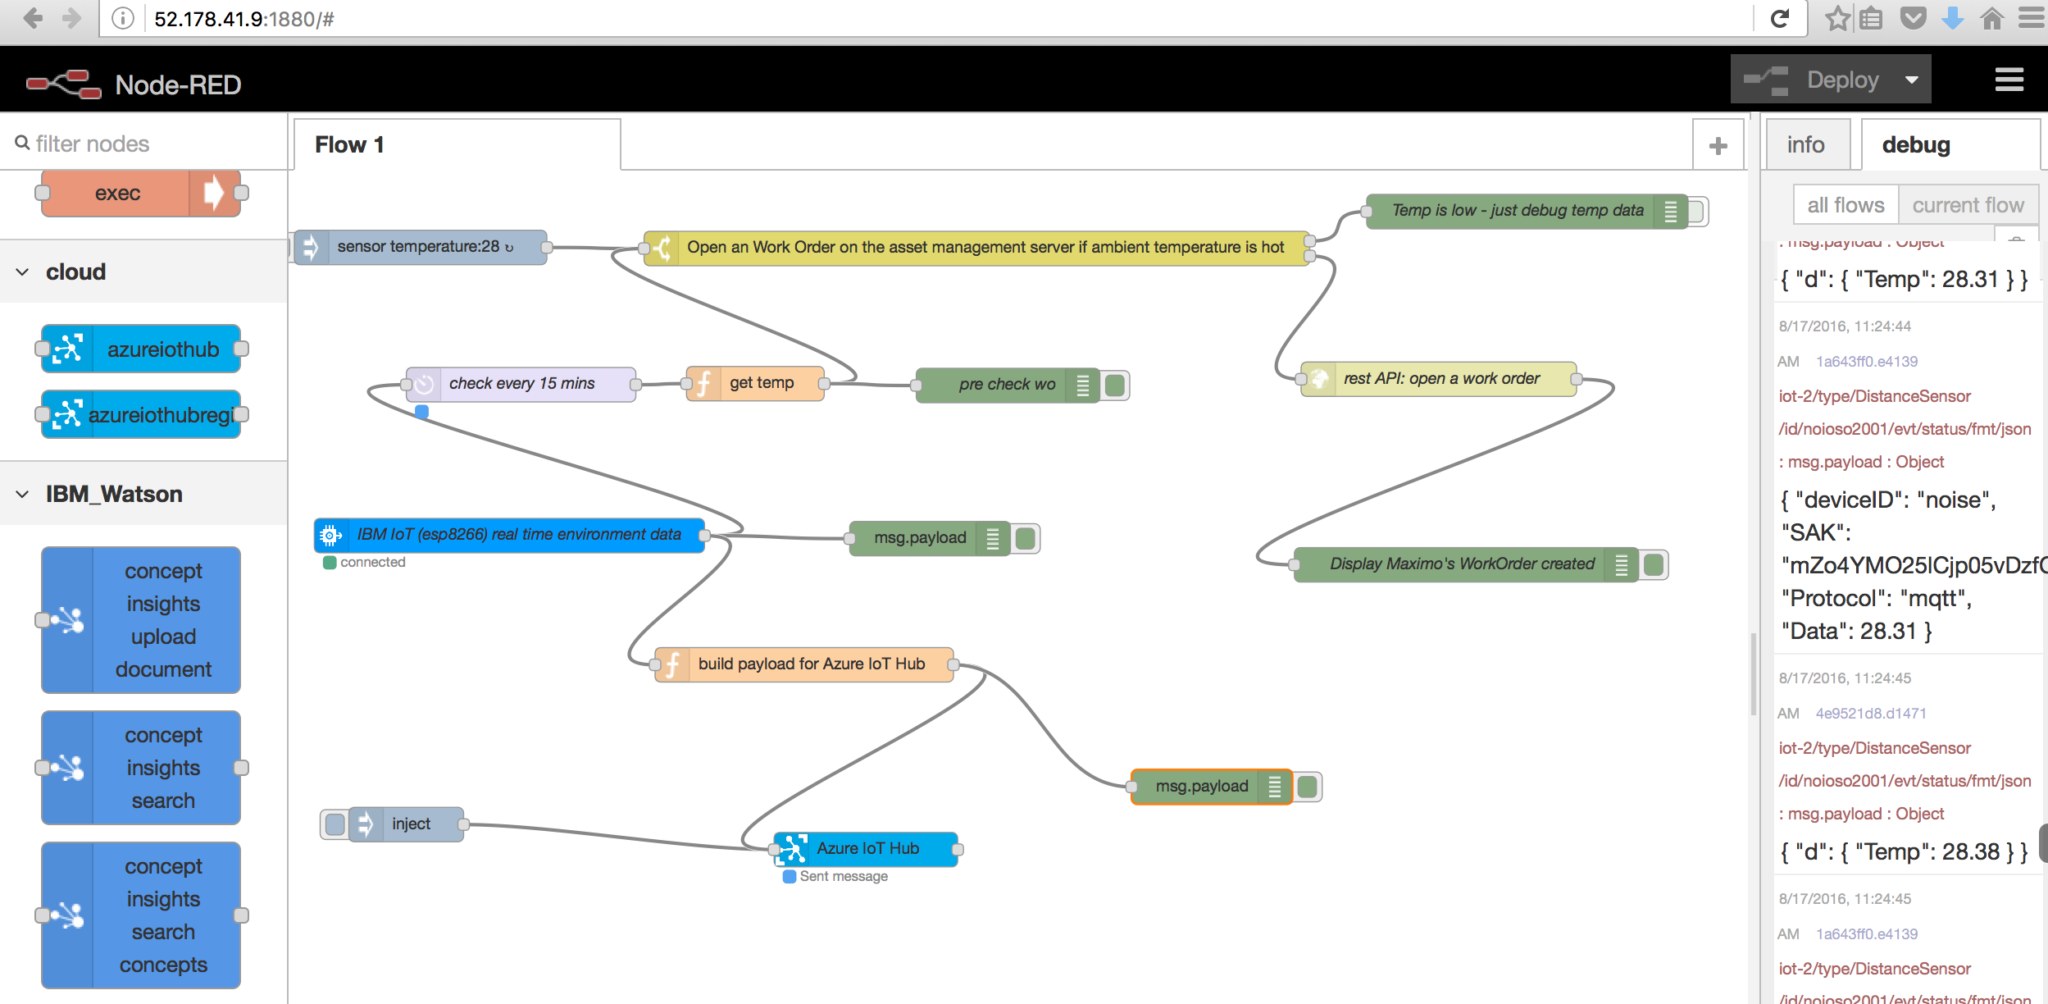
I created a Maximo work order from an IoT device. I used the ESP8266 device to monitor a room’s temperature and if the detected temperature is more than 23° Celsius a work order is opened against Maximo. In this scenario I use the Maximo rest API to open a Work Order. Moreover the IoT data are sent from Watson IoT platform to Azure IoT Hub by the specific Azure IoT Hub node.
Second Azure node-RED flow
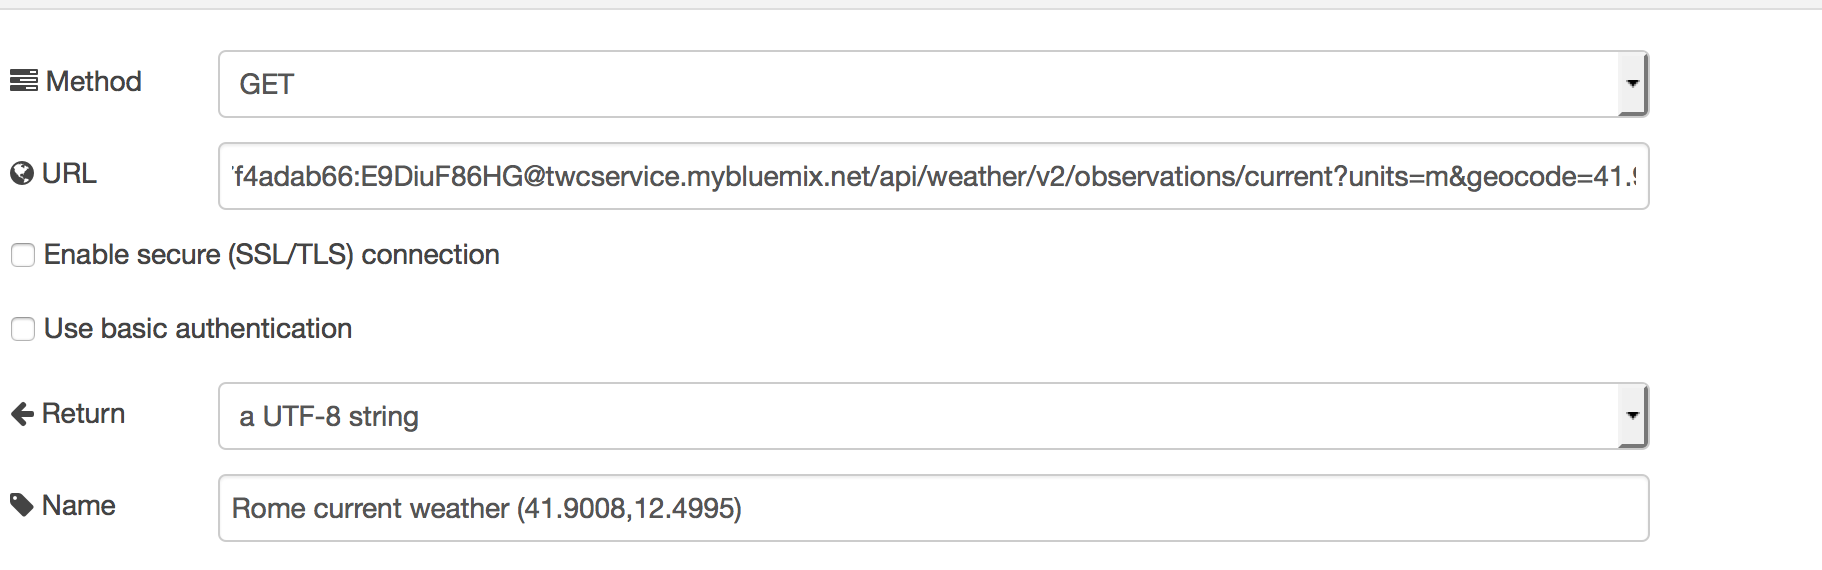
For the second scenario I used the Weather Company service on Bluemix

and the Weather Company rest API to get the current temperature in a specific location:
Here is the end to end scenario:
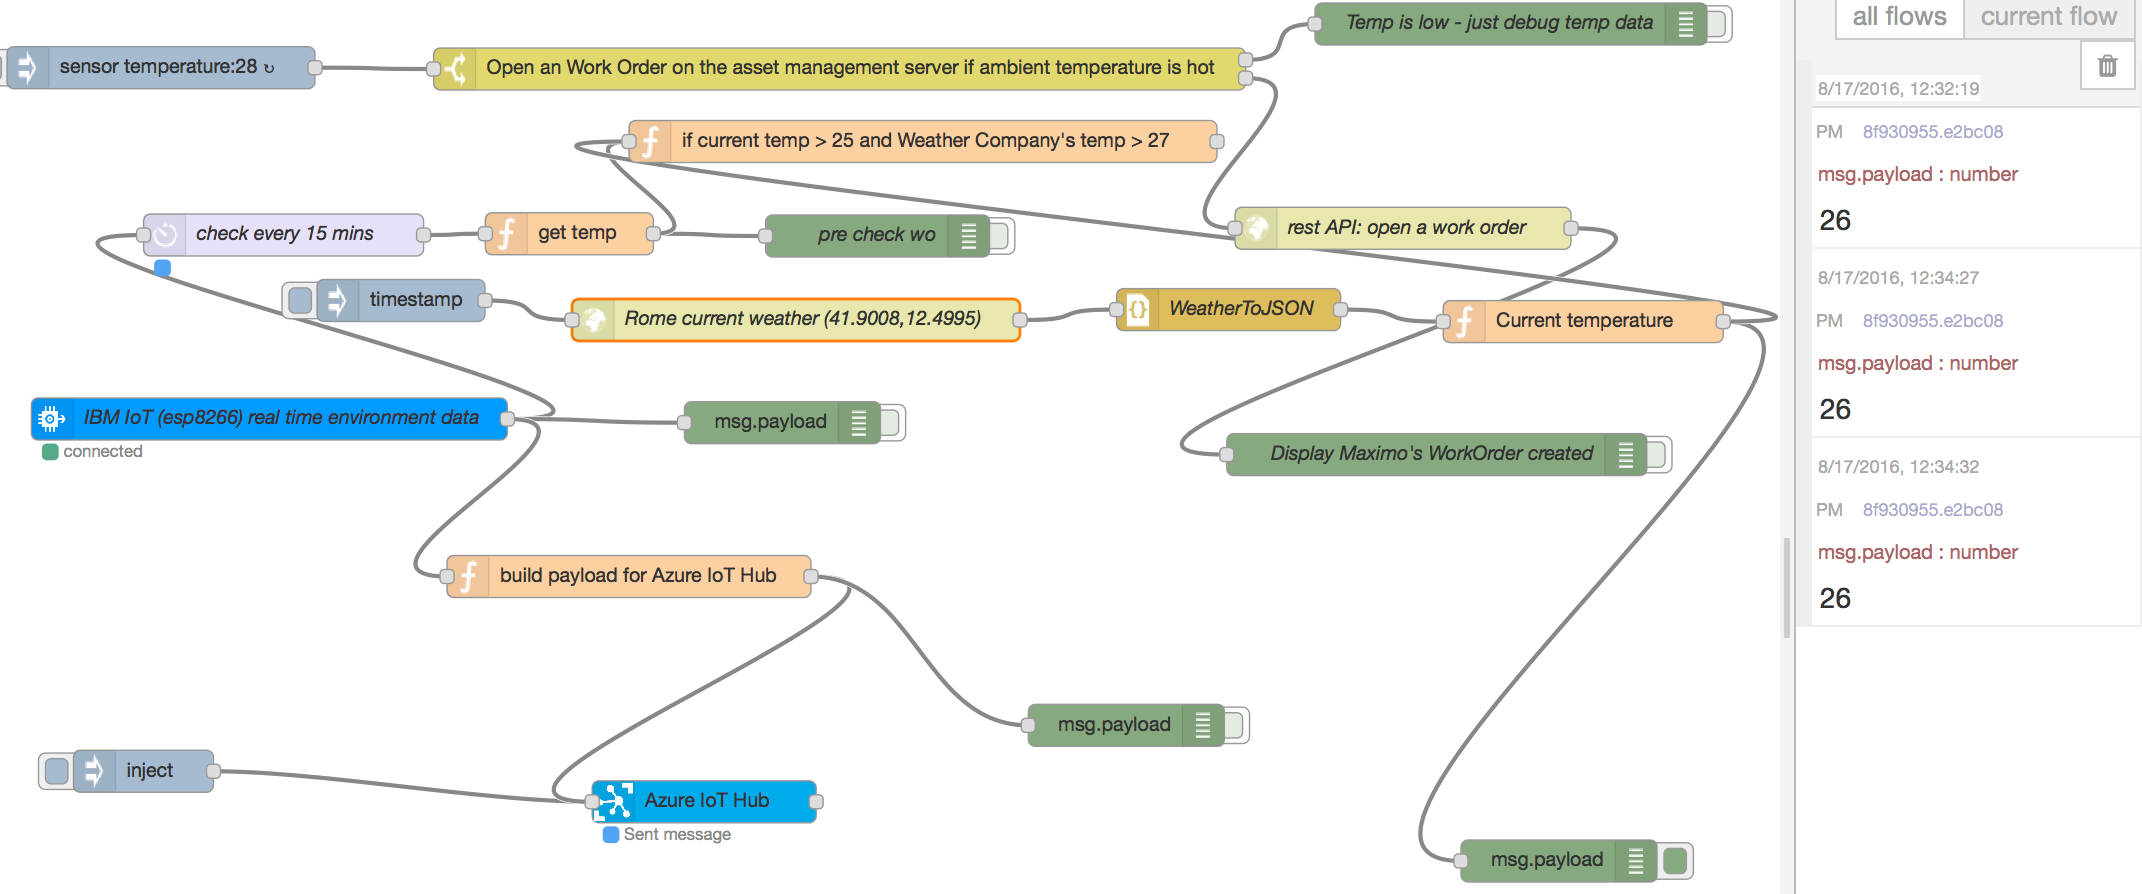
I created a Maximo work order from the IoT device as the previous example, but in this case the work order is open if the room temperature is more than 23° Celsius and the external temperature is more than 27° Celsius. The room temperature is sent by the IoT device, the external temperature is temperature provided by the Weather Company API.
so yeah that’s all for the moment, thanks for reading.


One Comment