Cooking Temperatures for Beef with IBM Watson IoT platform
The secret to perfect meat every time is a meat thermometer. My wife told me to buy a thermometer to check the cooking temperature, but I think that cooking temperature for beef with IBM Watson IoT platform is much more funny 🙂
There are many projects around the web regarding this topic, but my idea a bit different, I’m using the IBM Watson IoT platform to collect the temperature data and a web dashboard to display the real-time value during you cook the beef.
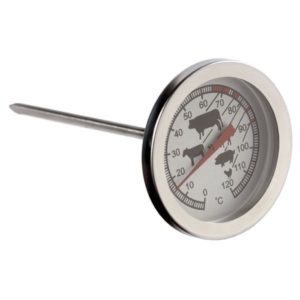
Instead of buying the standard thermometer:
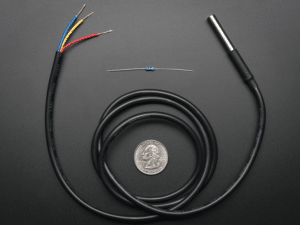
I bought a temperature measuring device for my ESP8266:
and I placed it in my kitchen near the other kitchen tools:
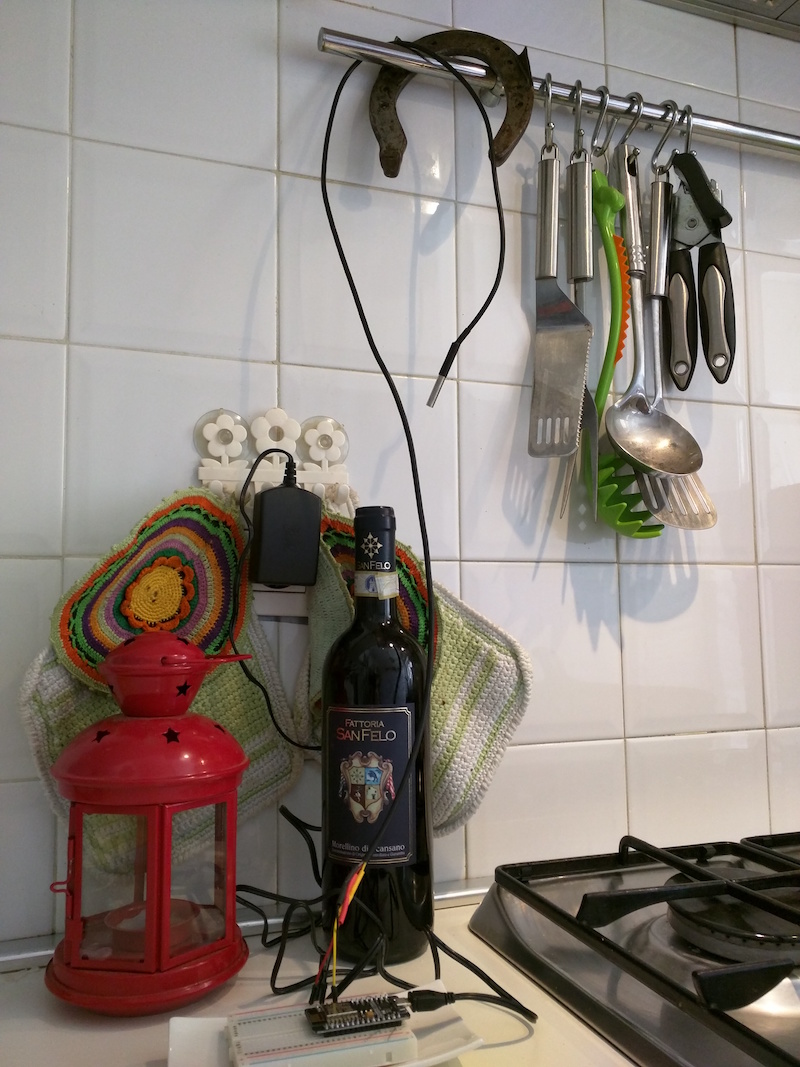
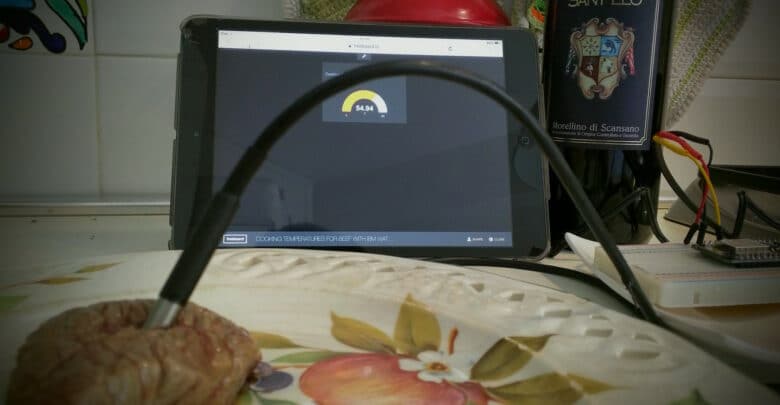
…and this is the result, too funny:
By the way, cooking temperatures for beef:
Rare:
• 50-55 °C (120-130 °F) Internal appearance very red; very moist with warm juices.
Medium-rare:
• 55-60 °C (130-140 °F ) Internal appearance lighter red; very moist with warm juices.
Medium (with a touch of pink):
• 60-65 °C (140-150 °F) Internal appearance pink red color; moist with clear pink juice.
Well-done:
• 65-75 °C (150-165 °F) Internal appearance no pink or red, slightly moist with clear juices

The IoT recipe
Ingredients:
- 1 ESP8266 microcontroller
- 1 ESP-12 developer board
- 1 a 3 volt power supply.
- 1 temperature measuring device
Method:
The ESP8266 is an Arduino compatible microcontroller and can be programmed with the Arduino IDE using the ESP8266 board support. First connect the temperature sensor to board, there are 3 wires in the sensor cable. Plug the red wire into the 3.3v bus on the breadboard. Plug the black wire into the gnd bus on the breadboard. The last wire should be plugged into pin D4 of the ESP8266.

Second, preparing a sketch to connect an ESP8266 to IBM Watson IoT Platform with Arduino SDK and publish the temperature date. Here is the sketch:
// Sketch to publish temperature from
// an attached sensor to IBM Watson IoT Platform.
// Mario Noioso - 2016

#include <SPI.h>
#include <ESP8266WiFi.h>
#include <WiFiClient.h>
#include <MQTT.h>
#include <PubSubClient.h>
#include <OneWire.h>
#include <DallasTemperature.h>

// which pin to use for reading the sensor?
#define SENSORPIN 2     // pin D4

// LED is connected to pin D1
const int LED = 5;      // pin D1

// set up a oneWire instance to communicate with the sensor
OneWire oneWire(SENSORPIN);

// pass the oneWire reference to Dallas Temperature
DallasTemperature sensor(&oneWire);

int status = WL_IDLE_STATUS;       // WiFi status.

#define MAX_MSG_LENGTH 100
char msg[MAX_MSG_LENGTH];

int MQTT_PORT=1883;
String server = "YOUR_ORGID.messaging.internetofthings.ibmcloud.com"; // IoT Server
String CLIENT_ID = "d:YOUR_ORGID:YOUR_DEVICE_TYPE:YOUR_DEVICEID";

// registered device
String AUTHMETHOD = "use-token-auth";
String AUTHTOKEN = "YOUR_TOKEN";

String PUBLISH_TOPIC = "iot-2/evt/status/fmt/json";
String SUBSCRIBE_TOPIC = "iot-2/cmd/+/fmt/json";

// variables to remember the measurements
int  lastRange = -1;
int  range = -1;

// Setup WiFi SSID and Password
char ssid[] = "YOUR_WIFI_SSID";
char pass[] = "YOUR_WIFI_PASSWORD";

WiFiClient wifiClient;
PubSubClient client(wifiClient, server, MQTT_PORT);

void setup() {
  // initialize the serial port for debugging
  Serial.begin(115200);
  // wait for serial to initialize
  delay(2000);

// Initialize the WiFi client library and connect to Wifi network:
  while ( status != WL_CONNECTED) {
    Serial.print("Conn SSID=");
    Serial.println(ssid);
    status = WiFi.begin(ssid, pass);

    // wait up to 3 seconds for WiFi connection:
    int count = 0;
    while ((count < 3) && (status != WL_CONNECTED)) {
      delay(1000);
      count++;
      status = wifiClient.connected();
    }
  }

  printWifiStatus();
  pinMode(LED, OUTPUT);
  // start the sensor library
  sensor.begin();
}

void loop() {
  int rc = -1;
  if (WiFi.status() == WL_CONNECTED){
    if (!client.connected()){
      Serial.println("Conn MQTT");
      if (client.connect(MQTT::Connect(CLIENT_ID).set_auth(AUTHMETHOD, AUTHTOKEN)))
        Serial.println("Connected to MQTT server");
    }
  }

  // get the current temperature
  getTemp();

  if (temp >= 0) {
    // send to the console
    Serial.print(temp);
    Serial.println(" Celsius");

    if (client.connected()) {
      // create message in JSON format
      buildMsg(temp);

      // publish the message
      if (!client.publish(PUBLISH_TOPIC, msg)) {
        Serial.print("Pub failed rc=");
        Serial.println(rc);
      }
    } else {
      Serial.println("Not connected for publication");
    }
  }

  // check if MQTT client is connected
  if (client.connected()){
    client.loop();
  }

  // measure 10 times a second
  delay(100);
}


void printWifiStatus() {
  // print the SSID of the network we are attached to:
  Serial.print("WPA SSID: ");
  Serial.println(WiFi.SSID());

  // print the IP address:
  IPAddress ip = WiFi.localIP();
  Serial.print(" IP=");
  Serial.println(ip);

  // print the received signal strength:
  long rssi = WiFi.RSSI();
  Serial.print(" RSSI=");
  Serial.print(rssi);
}

void getTemp()
{
  sensor.requestTemperatures();
  temp = sensor.getTempCByIndex(0);
}

void buildMsg(int range) {
 char  tempStr[24];

  // clear the current msg
  for (int i=0; i<MAX_MSG_LENGTH; i++)
  {
    msg[i] = 0;
  }

  // convert float to string
  String s = String(temp);
  s.toCharArray(tempStr, 16);

  sprintf(msg, "{\"d\": {\"Temp\": %s}}", tempStr);
  Serial.println(msg);
}
Third, registering the device on IBM Watson IoT platform dashboard, with ORGID, DEVICE_TYPE, DEVICEID and TOKEN.
Forth, using the nodeRED to handle the sensor data. To get in real-time the beef temperature from the car I used as input node the IBM Internet of Things Foundation node and a dweet node to display data. Dweet enables your sensor data to become easily accessible through a web based rest-API, allowing you to quickly make apps or simply share data, so I started to dweet my temperature data.
My preferred web dashboard, the freeboard, can use as data-source dweet.io to display data in real-time on the dashboard. This is my simple node-RED flow:

on the web dashboard I am able to see the beef temperature:

Roast Beef recipe
For cooking a decent roast there are countless variations on a theme, here is my recipes:
- A good quality joint of beef
- Salt and pepper (and other seasoning of your choice)
- Olive oil
Preheat the oven to 190°C, rub the meat with a generous amount of salt and freshly ground pepper. Heat your roasting pan on your hob and add a tablespoon or two of oil. Sear the joint on all sides until it is a delicious brown. Place in the oven and cook for around 15 to 20 minutes a pound for medium rare, basting with its juices every so often. Turn it half way through cooking. Remove the meat from the pan to a warmed plate, cover with foil and leave for at least 20 minutes before carving.
Use my prototype as meat thermometer and remove the beef at 55°C for a perfect medium rare.
Enjoy !

