How to embed Google Drive into IBM Maximo
By Google Drive the attachments are saved on cloud storage, so you can access everything from any computer, so long as you have an Internet connection. When you share documents, you can share them with anyone who has the link, or you can only allow access to specific people. Of course only Maximo knows the link where the documents are stored. You can choose to allow read-only access, or give specific individuals permission to edit documents.
Google Drive comes with ample storage (currently 15 GB) for free. This means you can store a lot of files without running out of space. Since Google Drive is so popular, it integrates with many other programs, which adds to the convenience factor.
I consider this to be a true alternative to attachments (DOCLINKS) configuration.
Is Drive Secure ? according to the terms of service appears to be “yes”. Google says it does not use Drive data for any purposes:
what belongs to you stays yours.
From account protection point of view the account has protected by two-factor authentication and a strong password is reasonably secure. That’s not the same as invulnerable, but it does mean anyone who wants the data in your Drive would have to use extraordinary measures to gain it.
How to embed Google Drive into IBM Maximo: it’s very simple to embed Google Drive into IBM Maximo:
FIRST of all you have to define a Google account where organize your documents visible to Maximo

SECOND you have to modify the Asset application with the following items (using application designer) :
- add a new custom TAB (Documentations)
- add a new section in the new TAB (Google Drive Integration)
- add an IFrame in section’s description with Google Drive address and root folder ID
You can add these lines in Asset.xml application file:
<tab id="docform" label="Documents">
                <section border="true" description="" id="main_attachments" label="Google Drive integration"><image align="left" column="2" height="32" id="1450444750157" imagename="drive_icon.png" width="32"/>
                </section>
</tab>
I suggest to add the description by application design to avoid to escape any characters cannot be used within XML because they have special meanings.
<iframe id="frameDoc" name="docs" width="700" height="300" src="https://drive.google.com/embeddedfolderview?id=0Bx_hTvuGJsINbDlsNWNlMzhHZzg#grid"></iframe>
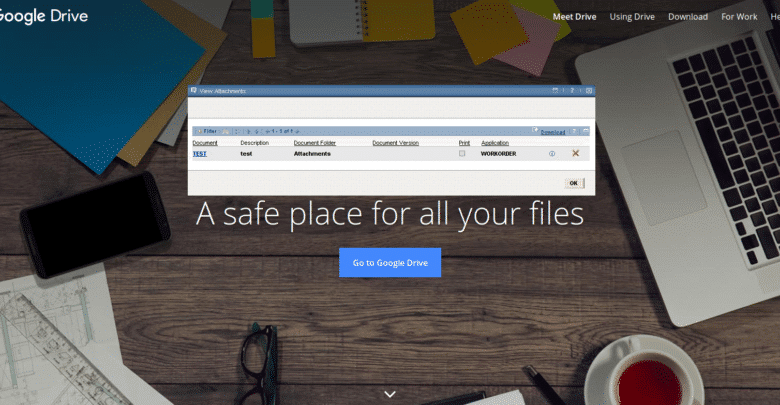
At the end the Asset application looks like this one:

Google Drive lets you open files directly from your browser.
Enjoy using the Cloud in IBM Maximo, your comments and suggestions are welcome.


thanks for suggestion, I will try metadrive as soon as possible
Hello,
Another possible way to integrate Google Sites and Google Drive is MetaDrive.
This tool allows you to display a Google Drive Folder inside Google Site Pages with extra functionalites, such as Advanced Search, Filters, Metadata, Views, etc..
http://metadriveweb.com/
Hi Mark, thanks for reading and thanks for feedback.
beyond to embed Google drive inside your Maximo application tab you can manage the docs with simple rest api.
https://developers.google.com/drive/v2/reference/
So you can print out your documents when an object status change and so on.
Maximo/Control desk next gen will be a node js application with a cloud storage, and it will use many and many rest apis.
Hi Mario,
It is an interesting proof of concept but I don’t think it can truly be “a true alternative to attachments (DOCLINKS) configuration”
attached documents can be printed out with workorders on status changes and that isn’t possible using this solution because the status change code wouldn’t know about the document to be attached.
That would require a more sophisticated customisation at the doclinks level, perhaps a future version of Maximo will support this as an option.
Best regards,
Mark
Yes you right. The folders have the same structure of your assets, but it’s a proof of concept you can use the drive in other applications where the attachments are related to the application and not to the specific object.
Hi Mario ,
In this case it the attachments won’t be a record specific documents , user can navigate to any folder from any application moreover it is not following maximo security matrix .
Regards
Amir Anwar