Internet Of Things with Android
In this article I’m showing you how turns your Android phone into a IoT device. I used the IoT Starter application, it is an application for interacting with the IBM Internet of Things Foundation. The application turns your mobile device into a sensor that publishes and receives data to and from the cloud using the MQTT protocol.
You can download the code from GitHub or the android app here.
IoT Foundation is a cloud-hosted service to simplify managing all of your IoT devices. The key features provided by the service include: device management, scalable connectivity, secure communication, historical data.
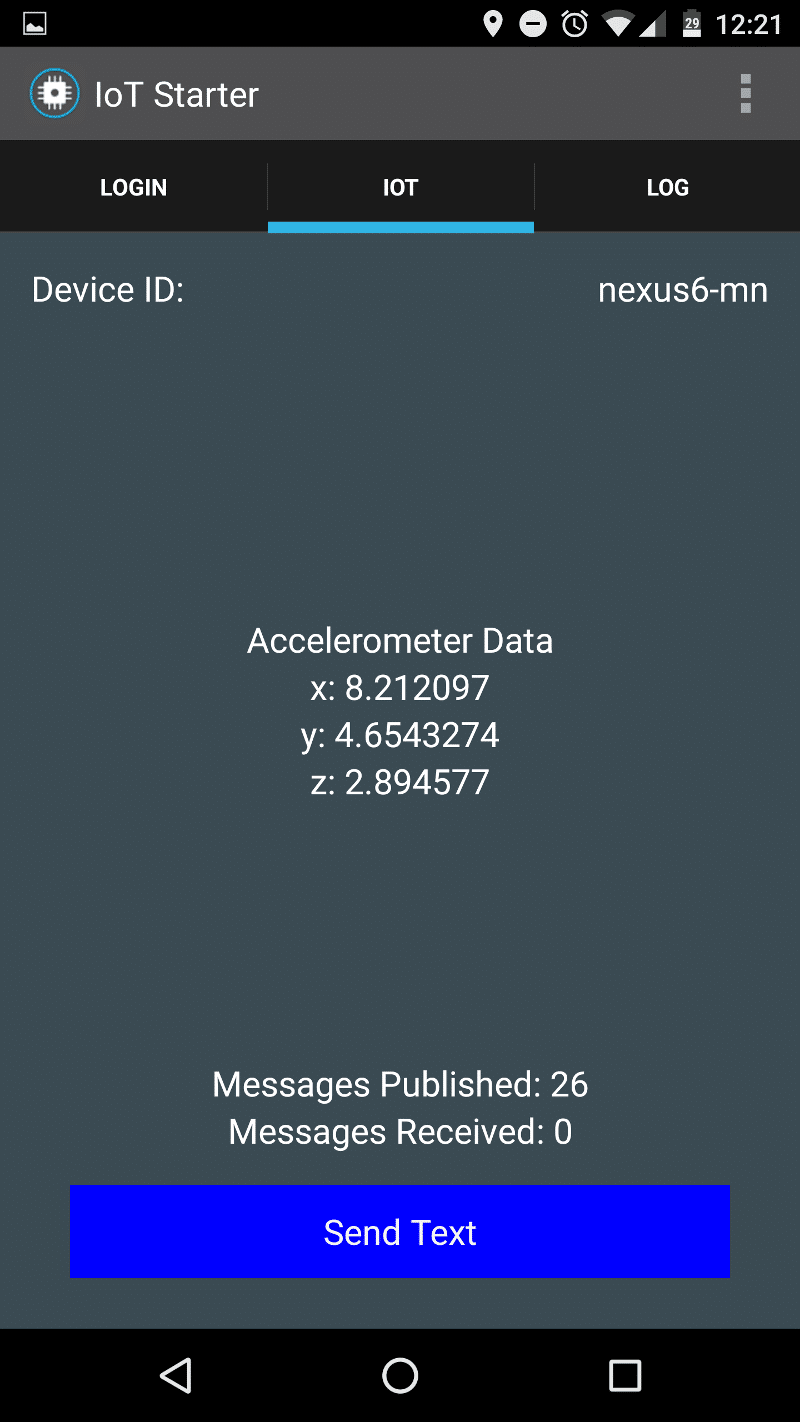
With IoT Starter application you can try Internet Of Things with Android and provides a variety of events and commands that it can publish or receive data to and from. Events and commands are user defined values used to differentiate the data that you publish or receive. For example, if you have a device that is publishing GPS coordinates, you may choose to publish it as a GPS event. Or, if you want to send an alert command to a device, you may choose to publish it as an alert or notification command. The application can publish data to the following event topics:
- Accelerometer (accel event)
- Touchmove (touchmove event)
- Text (text event)
Here the steps:
First one in Bluemix you have to add the IBM Internet of Things service that lets your apps communicate with and consume data collected by your connected devices, sensors, and gateways, so your apps can then use real-time and rest-APIs to communicate with your devices and consume the data you’ve set them up to collect with the Internet of Things service:

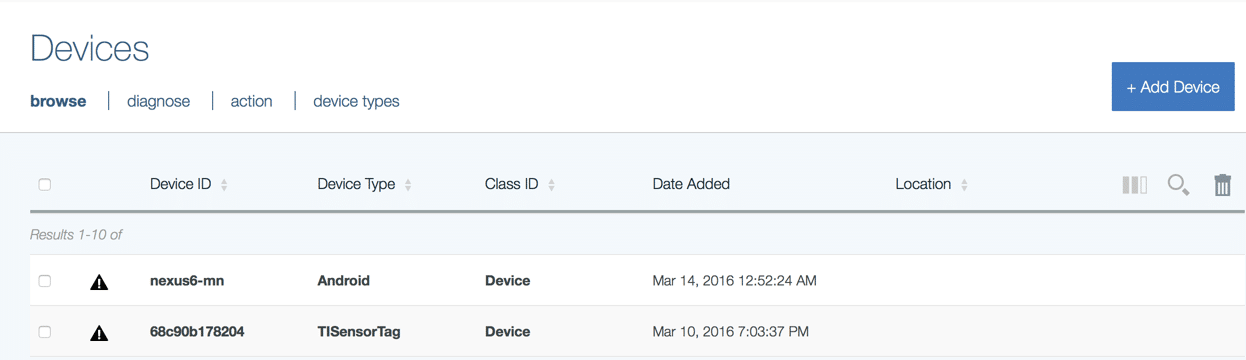
Next, on the Internet of Things service click on Dashboard. This will open the configuration page for the service. From here, you can click the Add device button and add Android device with an ID that you will set on the smart phone application later :
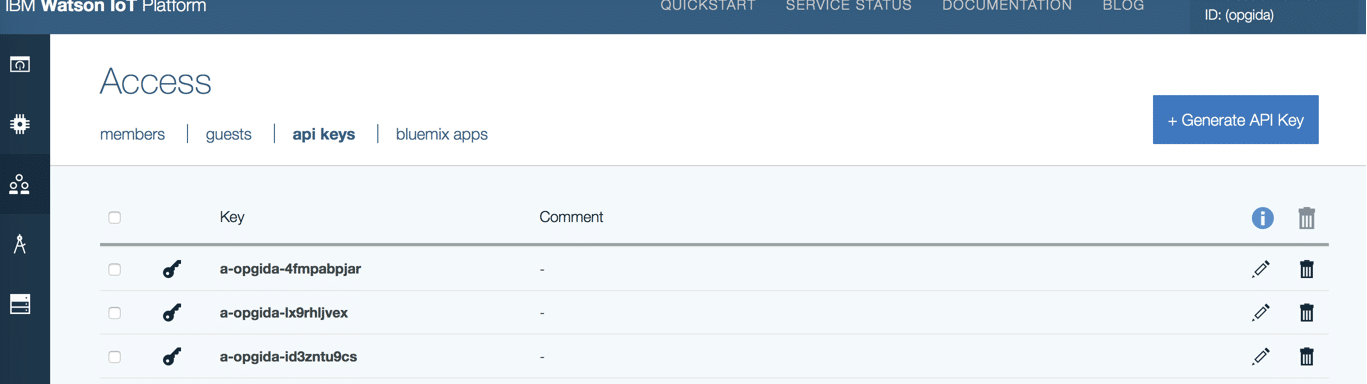
then you are able to generate API key and authorization token to use in android application to connect to IoT foundation service :
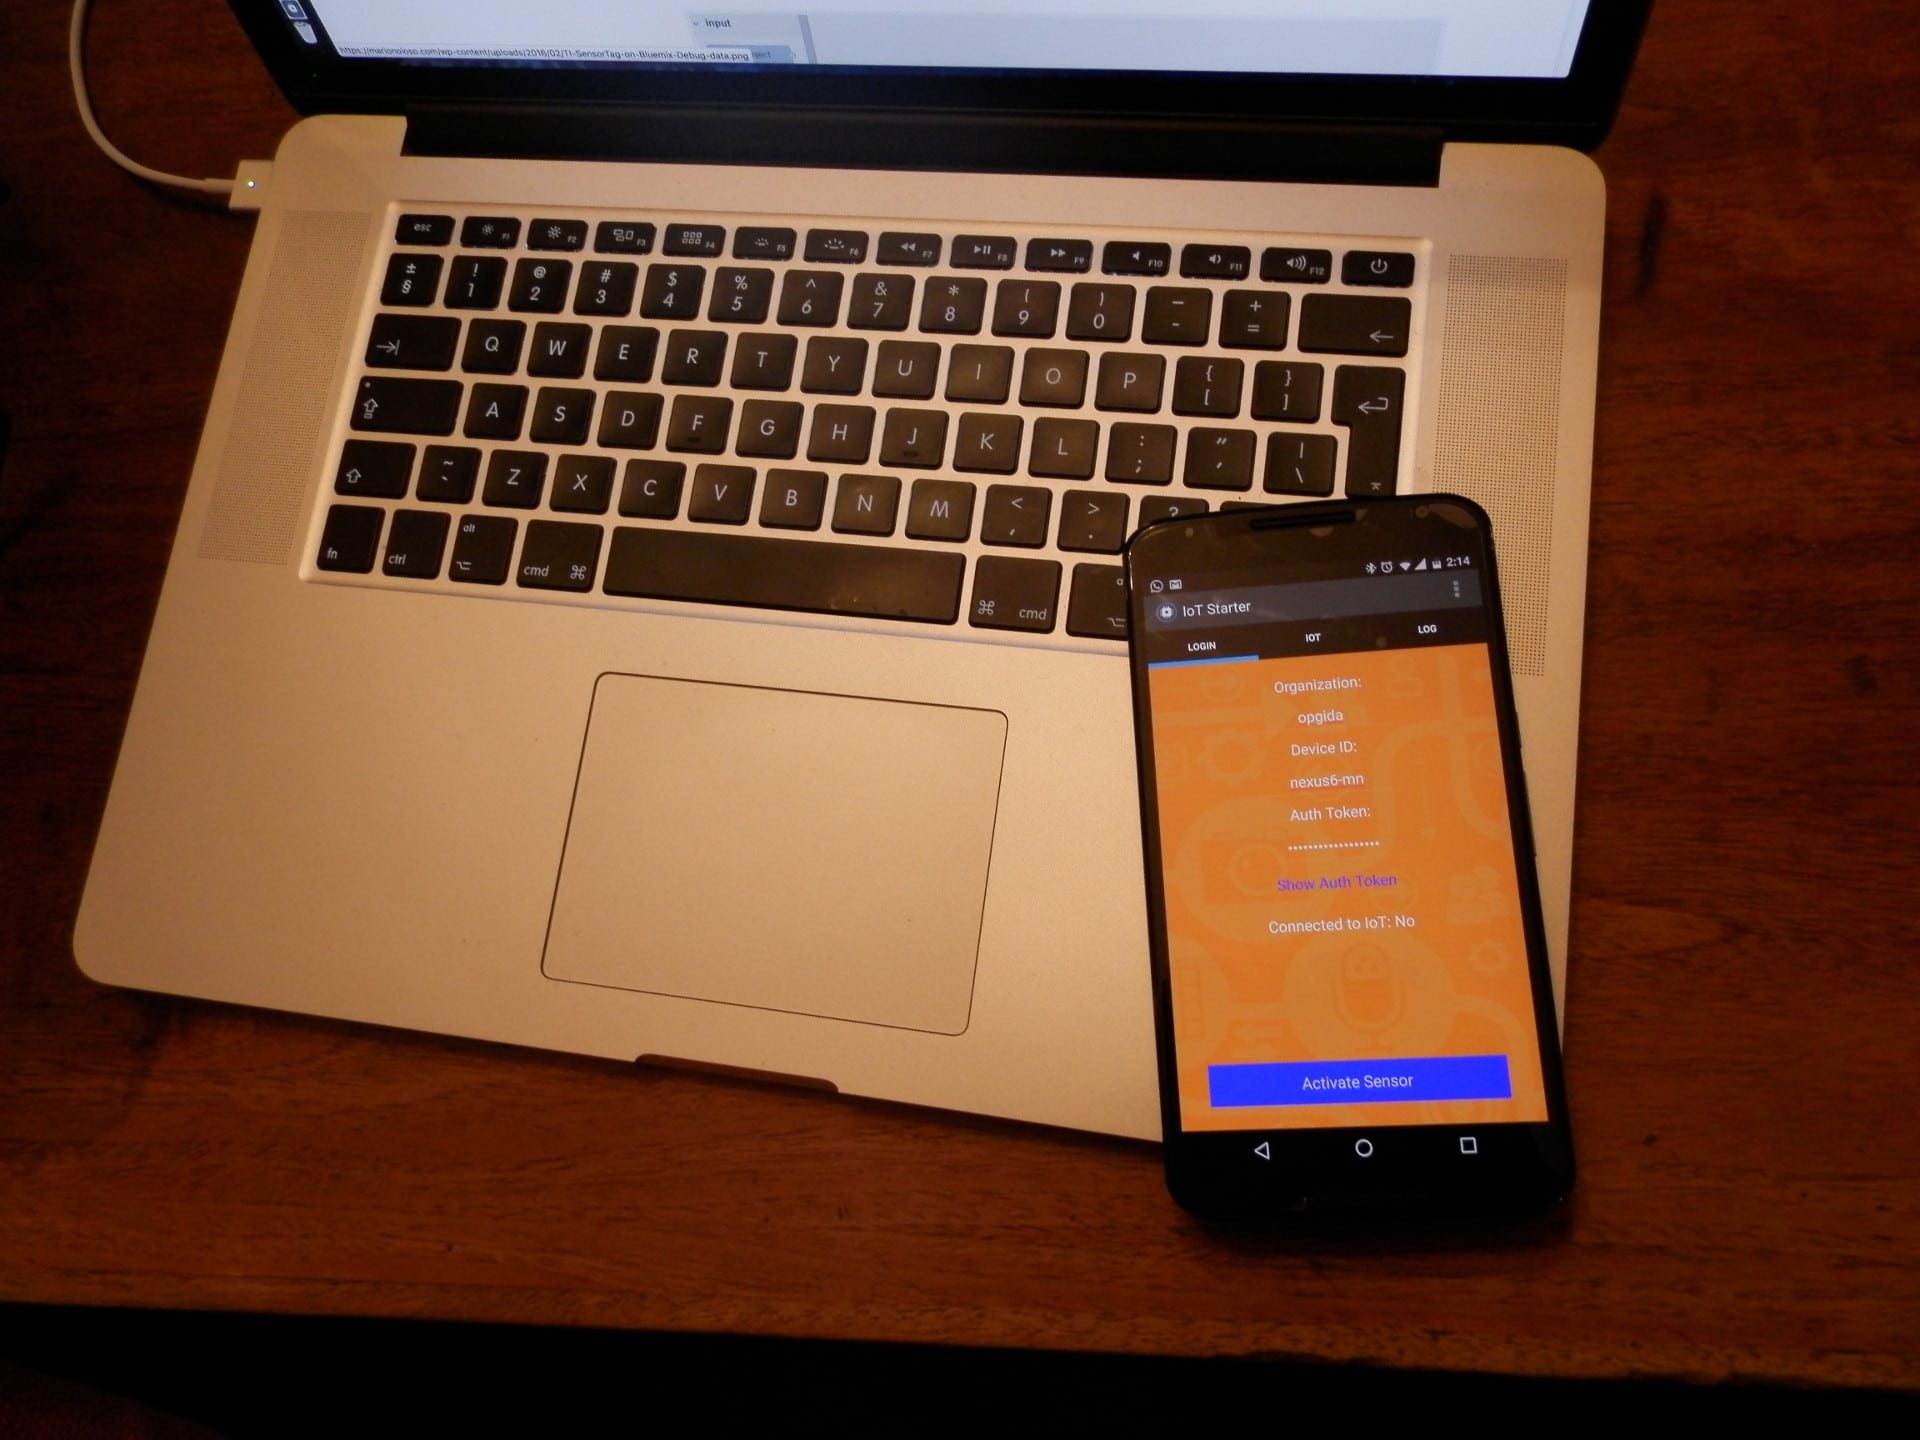
From your android smart-phone install this app, to allow the installation of .apk app on your Android phone you only have to go to Menu > Settings > Security and tick the box that says Unknown Origins or Unknown Sources. At this time running the IoT Starter application, at the first launch the application, a Login screen will appear where you have enter the following information defined before in Internet of Things service:
IoT organization
Device ID
Authorization token
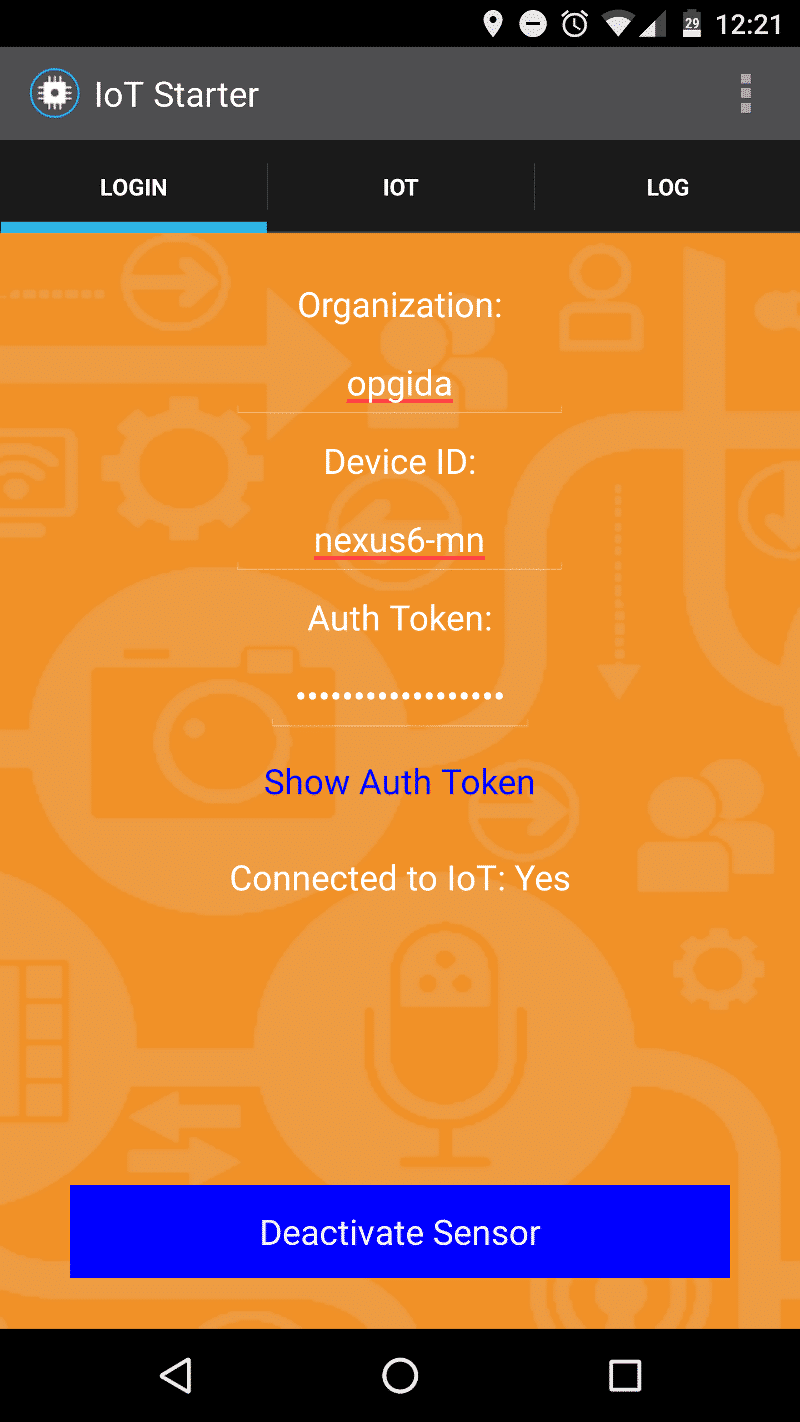
Once you have entered the correct values, the device is ready to connect to your IoT service by activate sensor button. While the application is connected, it can handle a few different kinds of inputs and outputs. All inputs come from IoT command topics. All outputs go to IoT event topics.
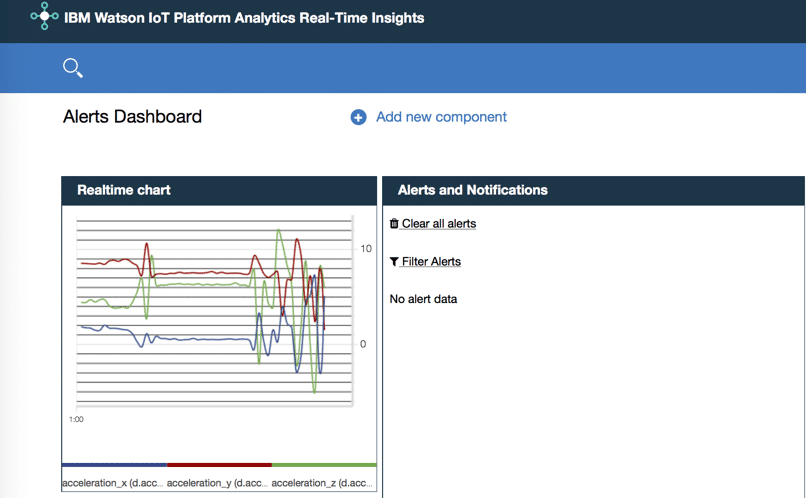
To display the device data I used the IoT Platform Analytics Real-Time Insights. By IoT Real-Time Insight you can perform analytics on real-time data from your Internet of Things devices, and gain insights about their health and the overall state of your operations. I created a simple dashboard with the acceleration data received from Internet Of Things with Android:
By IoT started you can use other sensors present in an Android smart-phone, not only for acceleration. I believe there are much more use-cases, for example in node-RED you can trigger smart flows based on phone events. We will enjoy a lot with this app.
Any comments and suggestions are welcomed.